Wednesday, 6 May 2020
Monday, 4 May 2020
Saturday, 18 April 2020
Friday, 17 April 2020
My garden&allotment.

Blueberries.

Blueberries

Blueberries

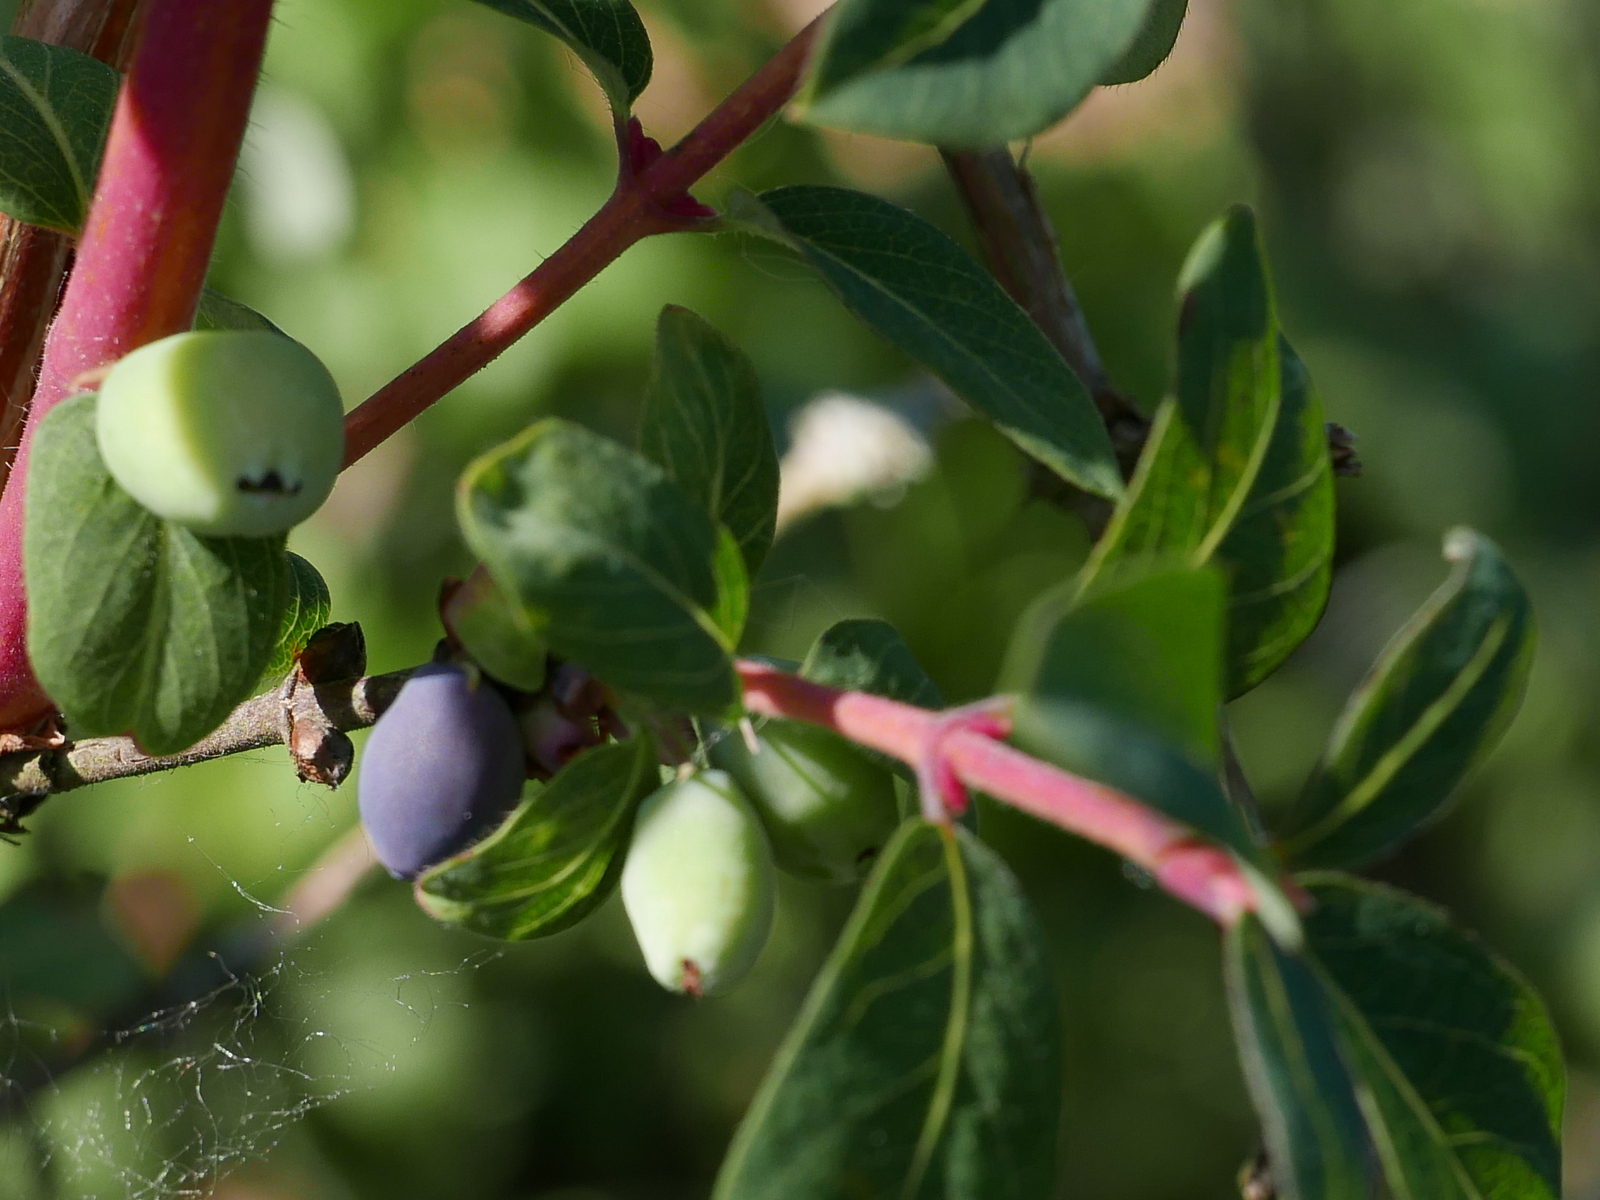
Lonicera caerulea/Honeyberry/blue honeysuckle/haskap/Жимолость (Lonicera)

Solanum tuberosum/Potato

Raspberry

Salvia officinalis/sage

Tree peonies

Tree peonies

Pelargonium - summer bedding plants often called "geranium".

Allium ursinum, known as wild garlic, ramsons, buckrams, broad-leaved garlic, wood garlic, bear leek or bear's garlic.

Euphorbia mellifera

Native British Bluebell

Aucuba japonica

Quince treeя begins to bloom

A Room with a View
Monday, 6 April 2020
Wednesday, 1 April 2020
Sow seed under cloches outside.
Cucumbers.
(Except: - The best time to do this is in the second week of April 2017.)
...added plenty of well-rotted manure.
The cucumber seedling shown above is exactly two weeks after sowing.
- ridge cucumber - from Lidl.
Vert Petit de Paris.
Sowing period April - May. Harvest July - August. Germination 6 - 15 days.
- Cucumber Restina seeds, F1 hybrid ( Cucumis sativus).
Harvest July - August. Germination 6 - 15 days.
Most robust and earliest outdoor cucumber.
- Gherkins Hokus
For outdoors crops.
Has good resistance to Cucumber Mosaic Virus.
Green gherkin to 10cm, hardy plant with long fruiting period, mosaic resistant.
Sow March to June.
Harvest July to October.
Best grown in fertile soil or growing bags.

Wednesday, 4 March 2020
What is the Lasagna Gardening Method?
- Lasagna Gardening How To - GardenFork - YouTube
....cardboard over existing vegetation, including weeds and grass. Wet these materials thoroughly with a hose.
This will smother the plants already there and keep new weeds from coming up.
You’ll need lots of “brown” materials, such as
peat moss,
straw,
wood chips,
dry leaves,
shredded office paper,
sawdust or newspaper.
These ingredients are dry and decompose quickly.
They’re usually bulky, ensuring light, oxygen-rich soil.
You’ll also need “green” materials.
If you’ve composted before, you know that green materials are nitrogen-rich matter that is dense and moist.
Green materials include
compost,
manure,
untreated grass clippings,
animal bedding,
yard waste,
vegetarian kitchen waste,
coffee grounds,
seaweed and
blood meal.
Start layering your lasagna garden by alternating 12cm layers of brown material
with 8cm layers of green material.
Top the garden bed off with 12cm of garden soil.
Although you can build a lasagna garden any time of the year, fall is the best time.
Materials, such as dried leaves, are plentiful at the end of the gardening season and by starting the garden in the fall, you allow time for the soil amendments to break down and blend together.
When spring arrives, it’s planting time.
There’s no need to till a lasagna garden because its layers guarantee a soft, pliable growing medium.
Simply plant your seeds, water and you’re ready to go.
Once seedlings emerge, spread a 15cm layer of weed-free straw over the garden surface.
The straw breaks down over time, adding even more organic matter to your soil.
In the meantime, though, it conserves water and keeps weed growth down.
Although weed-free straw doesn’t contain weed seeds, it often contains barley or wheat seeds, which germinate and grow as grasses.
To deal with these, simply turn the straw over, which smothers them.
Every fall, add a few more layers to your lasagna garden for soil that becomes richer as the years go by.
Don’t go to great lengths to acquire materials for the layers. Simply use what you have in your yard or close at hand.
Although lasagna gardening can work on a large, traditional garden, most lasagna gardeners make raised beds with paths running between them. Raised beds can be as simple as raised mounds of soil, or as permanent as frames made with wood, rock or cinder block.
To make paths, simply lay cardboard where you want the paths, wet it well and mulch with wood chips or gravel.
Finally, lasagna gardening and good water conservation strategies go hand in hand. If you use overhead sprinklers, some of the water will run off the straw mulch. Lay soaker hoses underneath the straw mulch instead. The water goes directly to plants’ roots and the straw mulch prevents evaporation.
- What is the Lasagna Gardening Method? - YouTube
- NO DIG ABUNDANCE, a weedy field becomes garden in 9 months, using mulches only - YouTube
Subscribe to:
Comments (Atom)


